How to boost your old Mac’s performance?

Your 6 year old Mac has become slow. The successive OS upgrades have somewhat killed the performance of your Mac. It takes several minutes to start-up, firing Photos is a nightmare and even Word requires 30+ sec to open.

It’s time to rejuvenate your Mac thanks to a new SSD disk.

I have installed a (secondary) SSD in several Mac:

– iMac 27″ mid 2011: SSD Sata III SanDisk Ultra II 960 GB (in addition to the internal orignal HDD )
– iMac 21″ mid 2011: SSD Sata III SanDisk Ultra II 480 GB (in addition to the internal orignal HDD )
– iMac 21″ mid 2015: SSD Crucial MX300  1 TB, mounted in external USB3 disk case (I didn’t dare opening the 2015 iMac, due to the glued glass).
– Mac Mini 2012: Crucial BX200 Flash SSD Internal 2,5″ 480GB SATA III (in addition to the internal orignal HDD )

On all these Mac the new SSD is the boot disk, and everything works perfectly.

The performance gain is spectacular. The iMac 27″ (core i5) starts in 20 sec (cold boot). The iMac 21″ 2011 boots in 1 min 20 sec instead of 3 min on the original HDD. Word opens in 2sec, Photos in 5 sec.

For a very decent price (200 to 350EUR), the Mac is as fast as a brand new one. The disk swap opeartion is a bit hard and I would not recommend to do it without a level of technical background. But the result is really worth the sweat.

Comment booster les performances d’un vieux Mac?

Votre vieux Mac se traine un peu. Les différentes mises à jours de l’OS ont eu raison de sa fringante jeunesse. Il lui faut plusieurs minutes pour démarrer, lancer Photos est un calvaire, et même Word demande 30sec de réflexion pour s’ouvrir.

Redonnez une nouvelle jeunesse à votre compagnon de bureau en installant un SSD.

J’ai installé un (second) SSD dans mes divers Mac:

– iMac 27″ mid 2011: Disque SSD Sata III SanDisk Ultra II 960 Go (en addition du HDD interne d’origine)
– iMac 21″ mid 2011: Disque SSD Sata III SanDisk Ultra II 480 Go (en addition du HDD interne d’origine)
– iMac 21″ mid 2015: Disque SSD Crucial MX300 interne de 1 To, monté dans un boîtier externe (je n’ai pas osé ouvrir l’iMac 2015 à cause de la vitre collée)
– Mac Mini 2012: Crucial BX200 Disque Flash SSD Interne 2,5″ 480 Go SATA III (en remplacement du HDD interne d’origine)

Sur tous ces Mac, et ces différents modèles de SSD, ils sont en disque de démarrage système et fonctionnent très bien.

Le gain de performance est spectaculaire: mon iMac 27″ (core i5) démarre (cold boot) en 20 sec chrono. L’iMac 21″ 2011 démarre en 1min 20 au lieu de 3min avec le HDD d’origine. Les applications s’ouvrent instantanément, Word en 2 sec, Photos en moins de 5 sec.

C’est le jour et la nuit et cela redonne vraiment une seconde vie à ces ordis.

How to fill in and sign a PDF document without any printer nor scanner?

We often have to fill in and sign PDF document before sending them back via email or other internet method. In most cases, we would print the PDF, fill it in and sign it and eventually we would scan it in order to email it. How boring.

However, Mac and OSX offer a built in solution to do that without any printer nor scanner. Here is how:

  • Start by opening the PDF document in the preview app (native application)
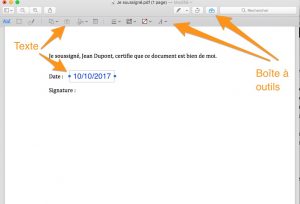
  • Open the toolbox
  • Using the Text tool, insert the text where needed (the date in this example)


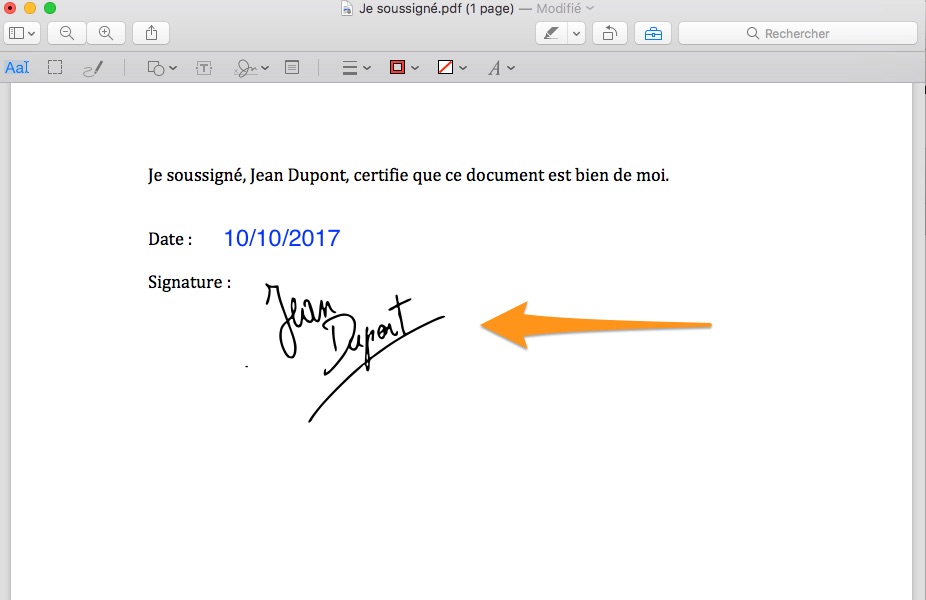
  • In order to add your handwritten signature, first sign on a blank sheet of paper, that we will present to the Mac’s camera in order to capture and insert it.


Simply clicking on the new signature will insert it in the document.  Save it and send it by email or other means.

That’s it!

Comment remplir et signer un document PDF sans imprimante ni scanner?

Souvent nous devons remplir des documents PDF et les signer avant de les renvoyer par email à l’école ou au staff scout. Dans ce cas, nous imprimons le document, le remplissons à la main, le signons puis le scannons avant de le renvoyer. Laborieux.

Mais le Mac et OSX peuvent vous aider à cette tâche sans imprimante ni scanner! Voici comment:

  • Commencer par ouvrir le document PDF avec Aperçu (application native)
  • Ouvrir la boîte à outils
  • A l’aide de l’outil Texte, insérer du texte à l’endroit voulu (ici la date)


  • Pour ajouter votre signature manuscrite, il va falloir signer une feuille de papier blanche, que l’on présentera à la caméra du Mac pour la capture et l’insérer:


Un simple click sur la nouvelle signature l’insèrera dans le document. Il ne reste plus qu’à enregistrer le document et l’envoyer par email ou toute autre méthode électronique.