Migrer vers un nouveau Mac

Vous venez d’acheter un nouvel ordi flambant neuf. Un Mac bien sûr. Votre ancien Mac a rendu l’âme ou vous désirez booster vos performance et profiter des nouvelles fonctionnalités offertes par les deniers modèles de Macbook Neo, Air ou Pro, ou même un desktop: iMac, Mac Mini ou Studio.

Mais voilà vous avez une flopée d’app et de données et vous vous demandez comment les migrer de l’ancien vers le nouveau et pourquoi pas faire un peu de nettoyage.

Plusieurs options

Plusieurs options s’offrent à vous avec des avantages et des inconvénients.

  1. Migration directe (Assistant migration)
  2. Restauration depuis Time Machine
  3. Installation propre + récupération ciblée 

Le choix de la méthode dépendra de vos besoins et de vos envies. Un nouvel ordi c’est aussi l’occasion de redémarrer “clean”.

Avant tout

Avant de commencer, et quoi qu’il arrive assurez-vous d’avoir un backup complet (si possible) de l’ancien Mac. A tout le moins, une copie des dossiers et documents importants. Ceci est un must, même si on ne compte pas changer d’ordi à brève échéance. Voir l’article sur le sujet:
https://ilovemymac.be/2021/03/10/quelle-strategie-de-backup-pour-votre-mac/

iCloud

iCloud n’est pas un backup à proprement parler de vos data, mais s’avère un allier précieux dans le cadre d’une migration. En effet, avec l’option 3 Installation propre, rien de plus simple que de lancer le nouvel ordi, faire la config de base sans migration et se connecter au compte iCloud. Toutes les data iCloud seront automatiquement récupérées sur le nouveau Mac: vos photos, documents, trousseau (mots de passe), etc.
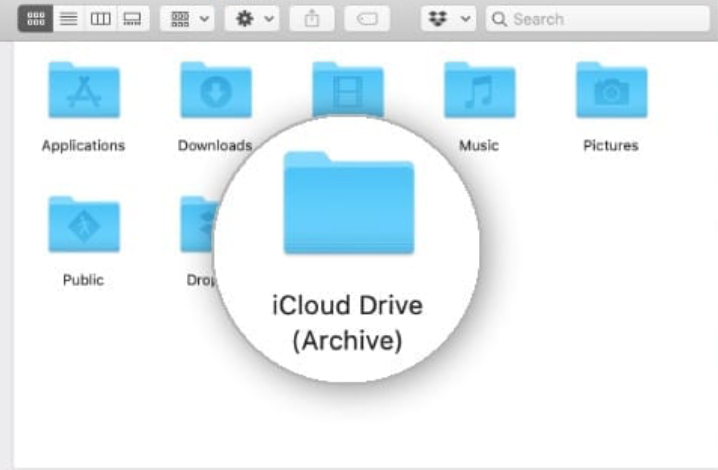
Contenu Offline

Attention au contenu offline c-à-d tout contenu, documents, images, databases, etc partagé dans iCloud. Il faut impérativement avoir une copie de ces fichiers sur un disque externe ou une autre option cloud telle que Dropbox ou Microsoft Drive. C’est le cas typiquement de certaines applications qui stockent leurs données hors iCloud, comme iMovie, GarageBand, ou autres suites Creative. Idem avec les photos contenues dans des Photothèques autres que la photothèque système (la seule qui se synchronise sur iCloud). Ces données devront être restaurées manuellement ou, pourquoi pas, conservées offline sur leur disque externe définitivement.
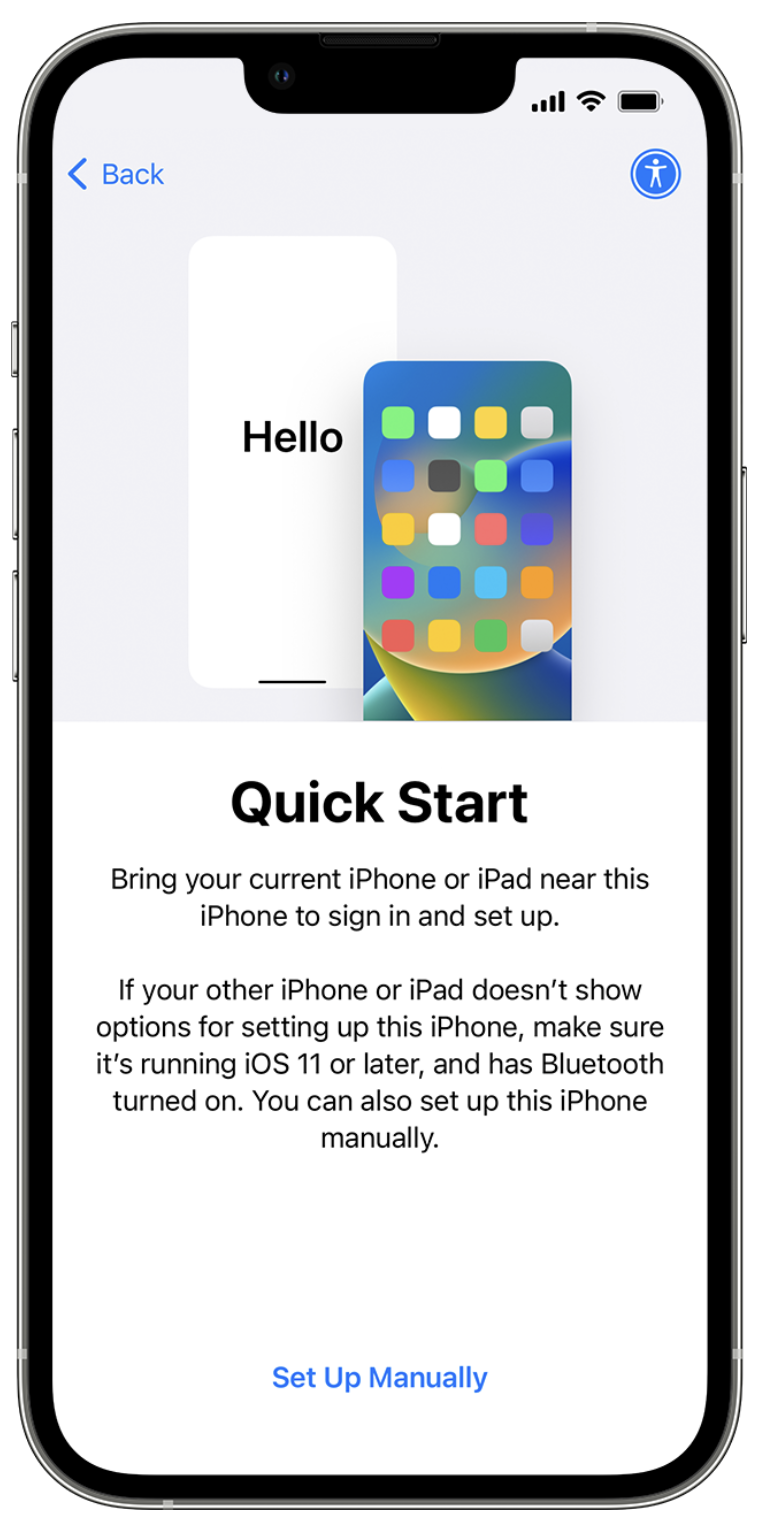
Migration directe

La migration directe permet de transférer les data de l’ancien vers le nouveau Mac. Cela nécessite que l’ancien ordi soit toujours présent (ça ne marche pas pour un ordi perdu ou volé) et fonctionnel.

Cette méthode est très rapide (dépendant du réseau Wifi ou câblé ) et le nouvel ordi est fonctionnel dès la fin de la migration. Attention cela peut durer quelques heures en fonction du volume de data.

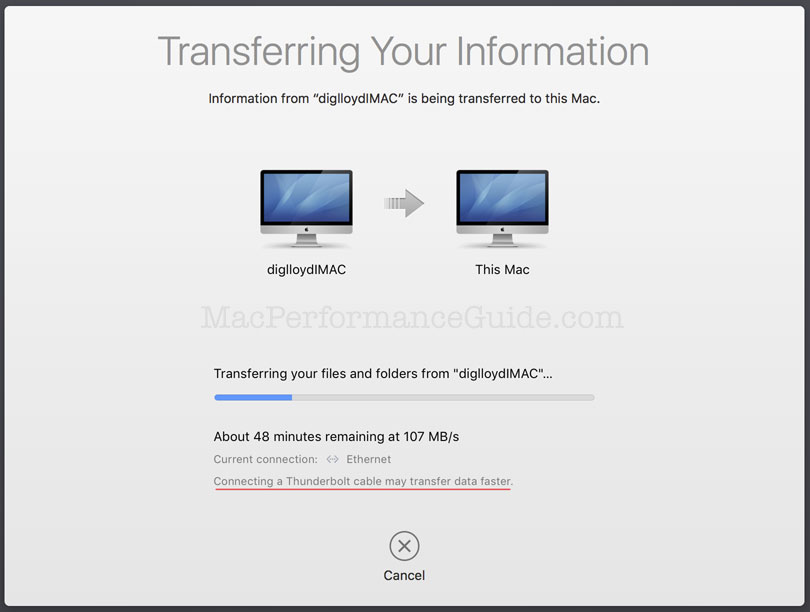
L’inconvénient de cette méthode est que tout est transféré et donc on repart avec un nouvel ordi déjà bien rempli ou potentiellement déjà saturé. Cela inclut les préférences corrompues, les fichiers inutiles ou obsolètes et les app oubliées et potentiellement inutiles également.

Restauration depuis Time Machine

Time Machine c’est le backup intégral du Mac sur disque dur. Cette méthode est assez similaire à la migration directe.

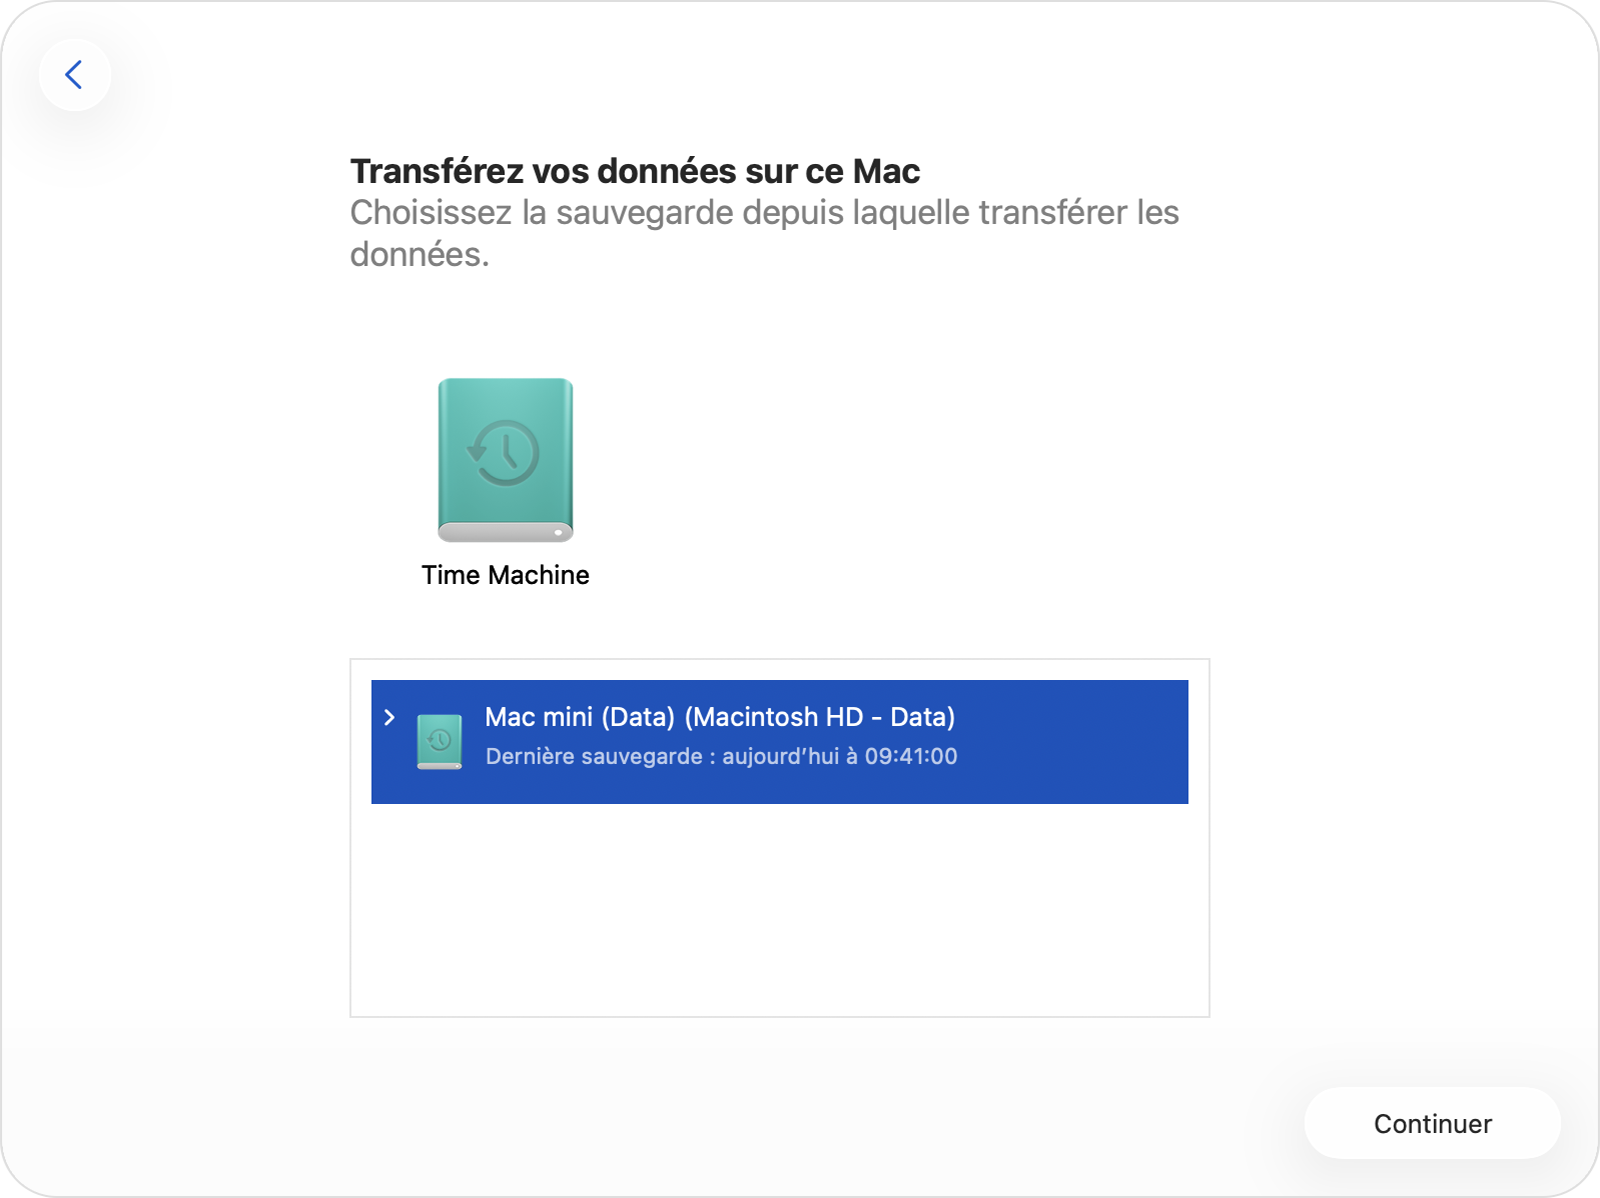
Cela permet de restaurer une sauvegarde complète. Le nouveau Mac sera identique à l’ancien.

L’inconvénient majeur est encore plus problématique dans le sens ou absolument tout est restauré de l’ancien Mac, y compris les fichiers caches et systèmes. On se retrouve avec un nouveau Mac chargé comme s’il avait vécu toutes les longues années de l’ancien.

Autre inconvénient, la restauration depuis Time Machine des photos et autres Documents et Bureau crée en quelque sorte une nouvelle version de ces documents sur le disque local et iCloud devra les synchroniser avec son drive dans le nuage ce qui est assez lent et intensif sur le réseau.

Installation propre + récupération ciblée

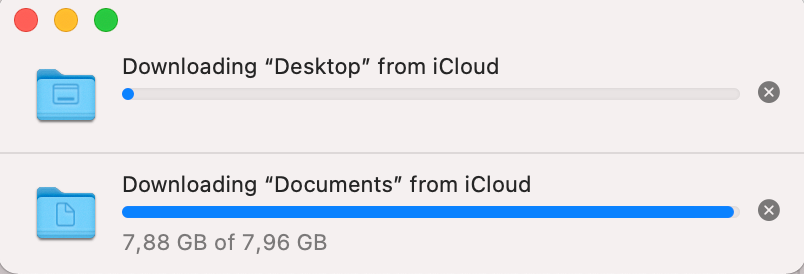
Cette méthode permet de démarrer une nouvelle vie sur un nouveau Mac sans rien perdre de l’ancien et tout en faisant un grand nettoyage. Lors de l’installation on choisira “Setup as new” et on se connectera ensuite à son compte iCloud ce qui permettra de retrouver les data.

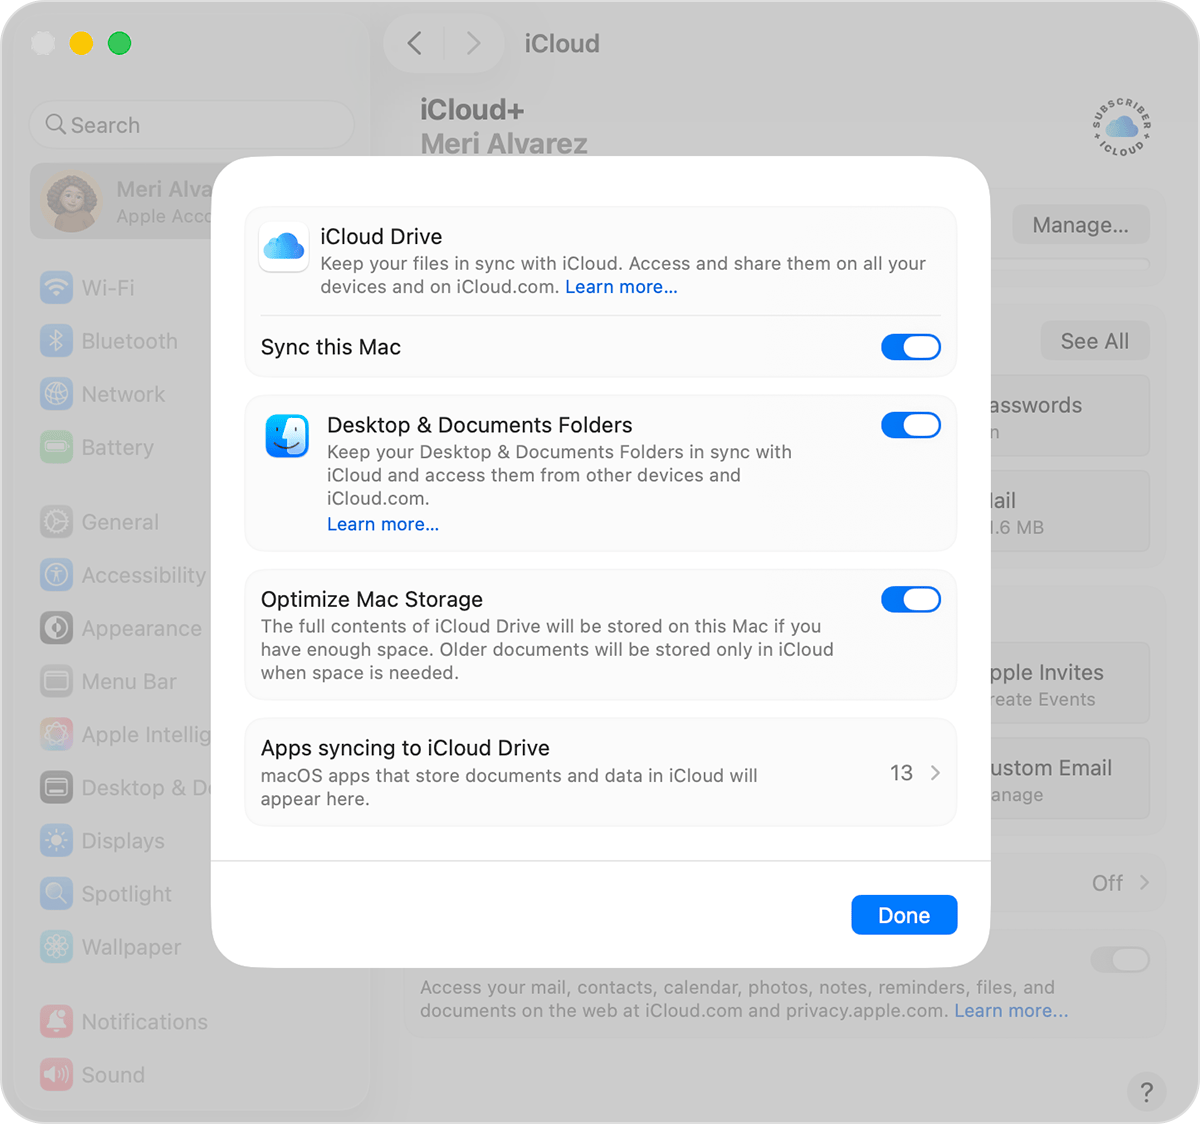
Si iCloud était bien configuré sur l’ancien Mac pour Photos, Documents et Bureau, tout cela sera redescendu du nuage. Cette opération peut prendre de nombreuses heures, mais elle se fait en background (arrière-plan) et le nouveau Mac est opérationnel immédiatement. Il faut une bonne connexion à Internet puisque tous les fichiers data seront récupérés dans iCloud.

Pour les Apps on se connectera à l’App Store et dans les propriétés du compte on peut retrouver toutes nos Apps achetées ou simplement installées précédemment et on pourra choisir individuellement lesquels réinstaller. Cela permet un certain nettoyage.

A tout moment il sera possible de lancer l’assistant de migration pour récupérer sélectivement des data depuis la sauvegarde Time Machine pour d’éventuels documents ou app non synchronisés dans iCloud.

Cette dernière méthode est à mon sens la plus clean et celle qui permet le plus grand contrôle de ce qui est récupéré / abandonné.

One more thing!

Après cette étape, ne pas oublier d’activer Time Machine sur le nouvel ordi. Idéalement sur un nouveau disque Time Machine ou, si on est bien sûr à 100% d’avoir tout restauré, sur le même disque Time Machine après l’avoir effacé.

Migrating to new iPhone

I recently acquired a new iPhone and I was confronted with the question on how to transfer all my data and apps from the old one. I have done it in the past for friends and I wanted share my experience.

Mainly three options

In order to transfer data from one to another iPhone, there are multiple options like backup/restore through a computer, restore from iCloud backup or direct phone to phone copy.

Each of these methods has their pros and cons. Backup / restore via a computer obviously requires to be connected physically to the computer during the process. And this may be quite long. Similarly phone to phone copy requires both old and new phones to be sitting next to each other also for quite some time. Recent phones may embark several hundreds of gigabytes of data and this will drive the total transfer time. As Apple states it:

If you transfer directly from your previous device, you’ll need to wait for the transfer to complete on both devices before you can use them

https://support.apple.com/en-us/HT210216

My favorite option which I’ll describe here is iCloud backup and restore. It goes smoothly and after an initial minimum data restore, the remaining steps continue in background, allowing continuous usage of the old and new iPhones.

Prerequisites and first steps

First of all you need to have an iCloud backup of the old iPhone. You probably do have one since backing up is, in my humble opinion, a must.

When you turn on the new iPhone, you will be driven through the first steps like choosing the language, the country etc, and then the question of the restore option. See the details on Apple’s web site: https://support.apple.com/en-us/HT210216, before opting for the restore from iCloud. My old iPhone had 256GB of data, but this does not really matter, as the bulk of the data will come in background transfer directly on your wifi or data plan.

Once the initial setup is complete, a message is displayed announcing that the rest of the data will come later.

Completion

Now that the new iPhone is operational to the bear minimum, while your apps and data are being downloaded from the cloud, there is a number of manual things to be done.

Data plan

If you have a SIM card, take it out of the old iPhone and insert it in the new iPhone.

I have an eSim from Proximus (Belgium). Their website says you only need to visit the My Proximus page and access the QR code. Flash it with the new iPhone and boom, the eSim is transferred. Except that they are missing one important step before doing so: Deactivate the eSim from the old iPhone! If you don’t, you get a message that the QR is either invalid or not compatible with your device. No option: you must delete the eSim from the old iPhone. This is pretty scaring since when this is done, you have no data, no service, so sms. But yeah, I did it. Then I flashed the eSim QR code from My Proximus account and bingo the eSim was activated and pretty much immediately I got my services back, on the new iPhone. For some reason, the PIN code I had set on the eSim was invalid (I suppose it falls back to the initial PIN code). After three failed tentative I could use the PUK also provided on My Proximus web site to reset the PIN code to my desired one.

Wallet

Wallet was restored from the cloud, for each of the Apple Pay cards stored in Wallet, I had to validate them via the bank app. So first thing first, restore or setup the bank app.

Bank app

The bank apps (I have several) all had to be set a new profile, using the bank card and whatever method the bank uses to authenticate you, digipass, soft key, phone call,…

Itsme

In Belgium, we have Itsme, a kind of governmental / bank based authentication app that is very secure and allows access to official sites such as tax system or other finance services. The bank or an ID card reader can be used to validate your identity. Itsme needs to be reactivated on the new device and that is very straight forward: after providing the phone number you pick your favorite bank or eID reader to validate it. If it is a bank, it will be validated via a combination of the bank app (just restored at previous step) and a digipass or other secure method used by the bank.

Back to Wallet

Now that the bank app is setup, each of the Apple Pay cards in your Wallet can be verified. That goes via the bank app and your best smile (assuming FaceID is in use).

Whatsapp, Telegram, etc

Those apps are based on the mobile phone number and service. Once the number is confirmed, an SMS will be sent with a validation code. That’s as simple as that and all your contacts and conversations are restored on the new iPhone.

Mail apps

Mail app, or Gmail app will ask to sign in with your password. Make sure you know it or have access your emails if needed to reset it. No brainer.

Authenticator app

I use an authenticator app for Two Factor Authentication. It was restored fully after asking for confirmation twice that I wanted to restore it from its cloud backup. I did and all my authenticator items were back and functioning.

Photos

Last but not least, Photos. My photo library is iCloud based, that is all my photos are stored in iCloud. That requires most probably a paid service. It is my case.

Thanks to iCloud, my entire photo library was restored on my new iPhone. I don’t which photos are downloaded locally on the phone vs. those replaced by a thumbnail and residing really in Apple’s servers. But the result is that all my photos are reachable in Photos app. They were restored during the night. In no time though the first photos (most recent) were there, visible in the library.

In case your library is not in iCloud, the restore time between iPhones or from your computer via cable may be significantly longer.

That’s it

Your new iPhone should be operational by now. Depending on the apps and services you have, there might be additional steps and sign ins to be performed, such as Dropbox, or Office.

Enjoy!

iCloud drive not syncing?

Recently, after replacing the hard drive (SSD) of my iMac, and after restoring its content from Time Machine (see my post on the best backup strategy), I realized that my iCloud folders (Documents & Desktop) struggled a bit and didn’t seem to sync with iCloud anymore. Some documents edited on my MacBook Pro were not up to date!

Clicking on the circular progress bar icon of the iCloud folder shows a progress bar but it does not appear to progress at all. I hope that it will be better tomorrow. But nothing helps. The next day, the bar did not move by one inch. It is true that I total 30 GB of files in iCloud and after all, after a restore from Time Machine, with a potentially older version of some files, one could wonder how iCloud can handle this. That restored Excel file from yesterday appears to have been placed on iCloud just now. What about its more recent version on the Macbook?

Let’s take an example, the File.xlsx file was modified on 3/16/2021 at 4:09:23 PM on the Macbook. The Time Machine restore File.xlsx from 3/15/2021 at 9:37:43 PM, but the restore operation took place on 3/16/2021 at 5:00:00 PM. What will iCloud do? The most recent version of the file is the Macbook’s version, dated 03/16/2021 at 16:09:23.

Well in my case iCloud seems a bit lost and doesn’t sync anymore. Is this dilemma the cause of this hesitation? Who knows.

How to fix it?

Apple recommends, when iCloud no longer synchronizes, to close the session and reopen it after restarting the Mac. Closing the session, displays an alert: your files will be deleted from this Mac! You can keep a copy if necessary. In my case, no need for a copy, I still have my Time Machine backup and the cloud version. So I opt out and uncheck the local copy and close the session.

After restarting my computer, and reconnecting to iCloud Drive, surprise: my files are instantaneously restored to Documents and Desktop, but still not synced! Strange. I decide to try and log out of iCloud again, making sure I have unchecked the local copy option. I restart the Mac, but before reconnecting the iCloud session, I check the contents of my folders. Documents and Desktop are empty as expected, but there is a folder at the root of my account on the system drive: iCloud Drive (Archive). That’s my guilty party!

Yet I did not ask for it. So I rename this folder to “My iCloud Drive (Archive)” before I reopen the iCloud session.

This time it’s okay, my Documents and Office folders are both empty…. but they remain empty! I would at least expect to see the structure of these folders appear from iCloud, but no! Let’s pretend to not care and carry on with other things, while keeping an eye on my files. I create a “March 16” folder on the desktop, just to see. I open my MacBook Pro and see that this folder doesn’t seem to appear there … No iCloud cloud icon on the iMac either … No syncing!

And then suddenly, without any warning, my folders fill up again from iCloud. “March 17th” folder appears on the MacBook Pro and all the other documents and folders come down from the cloud to the iMac. Phew! Syncing has resumed. My File.xlsx is dated 03/16/2021 at 4:09:23 PM, i.e. the latest version loaded in iCloud from the MacBook Pro. All OK as expected!

Conclusion

iCloud management seems to be delivering to expectations. However, Apple leaves users in the dark. A dashboard that would show the status of iCloud syncing would not be a luxury, with a button to restart it and even manage possible conflicts. Let’s dream!