How to print from your iPhone or iPad?

Apple AirPrint is a handy feature for printing a document, image or more from an iPhone or iPad.

What you obviously need is an AirPrint compatible printer and a WiFi network to which the printer is connected, as well as your iPhone or iPad.

Apple provides a list of compatible printers on its About AirPrint page. On my side the printer I use is a Brother DCP-9020CDW.

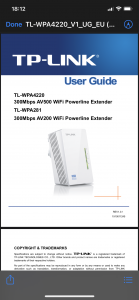
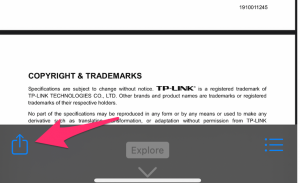
On your iPhone or iPad, open the document or web page you want to print. In the example a PDF document.

Document to print

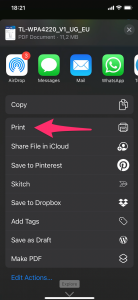
Click on the “share” icon. If the icon isn’t visible, tap anywhere in the document and it should appear along with other document-related options.

Scroll the next screen up if necessary to bring up the option “Print” .

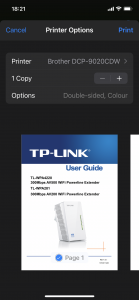
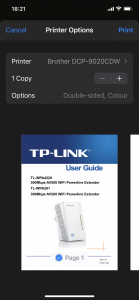
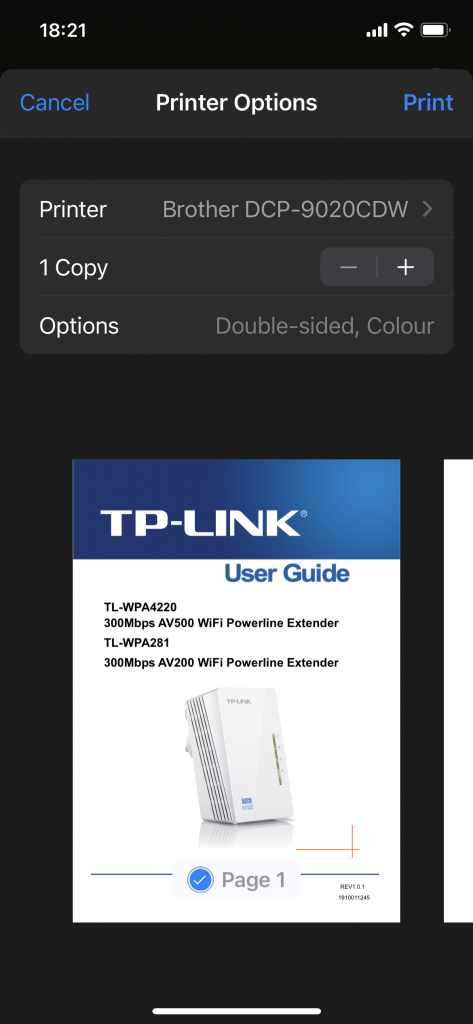
The next screen allows you to select printing options such as double-sided printing (if the printer supports it), color or black and white printing, number of copies, etc.

Usually the mentioned printer is your printer, in my case the “Brother DCP-9020CDW”. If not, tap “Select Printer” to display the list of printers available on your network and then choose the desired one.

When you are ready to print, finally click on “Print” at the top right. And your print should come out of the printer. That’s it, very simple.

If your printer did not appear in the list of available printers, it may require to run a setup application on your computer (PC or Mac) in order to configure it for AirPrint. In this case, refer to your printer’s user manual.

Comment imprimer depuis son iPhone ou iPad?

Apple AirPrint est une fonctionnalité bien pratique pour imprimer un document, une image ou autre depuis un iPhone ou un iPad.

Ce qu’il vous faut évidemment c’est une imprimante compatible AirPrint et un réseau Wifi sur laquelle l’imprimante est connectée, de même que votre iPhone ou iPad.

Apple fournit la liste des imprimantes compatibles sur sa page About AirPrint. Pour ma part, l’imprimante utilisée est une Brother DCP-9020CDW.

Sur votre iPhone ou iPad, ouvrez le document ou la page web que vous désirez imprimer. Dans l’exemple un document PDF.

Document à imprimer

Cliquez sur l’icône “partager”. Si l’icône n’est pas visible, taper n’importe où dans le document et elle devrait apparaître ainsi que d’autres options liées au document.

Faites défiler l’écran suivant vers le haut si besoin afin de faire apparaître l’option “Print” (mon iPhone est en anglais) ou “Imprimer”.

L’écran suivant vous permet de sélectionner des options d’impression telles que l’impression recto-verso (si l’imprimante le permet), l’impression en couleur ou noir et blanc, le nombre de copies, etc.

En principe l’imprimante mentionnée est votre imprimante, dans mon cas la “Brother DCP-9020CDW”. Si ce n’est pas le cas, tapez sur “Select Printer” ou “Choisir l’imprimante” pour afficher la liste des imprimantes disponibles sur votre réseau et ensuite choisir la bonne imprimante.

Quand vous être prêts à imprimer, cliquez finalement sur “Print” en haut à droite (ou “Imprimer” si votre appareil est en français). Et votre impression devrait sortir de l’imprimante. Voilà, c’est tout, c’est très simple.

Si votre imprimante n’apparaissait pas dans la liste de imprimantes disponibles, il est possible qu’elle nécessite d’exécuter une application de configuration sur votre ordinateur (PC ou Mac) afin de la configurer pour AirPrint. Dans ce cas, référez-vous au manuel de votre imprimante.

How to scan a document on your iPhone

You received a paper invoice that you would like to archive in your computer. You are requested to fill a paper form, sign it and send it via email. But you don’t have a scanner at home. How can you do it?

You’ve got an iPhone? You’re good to go!

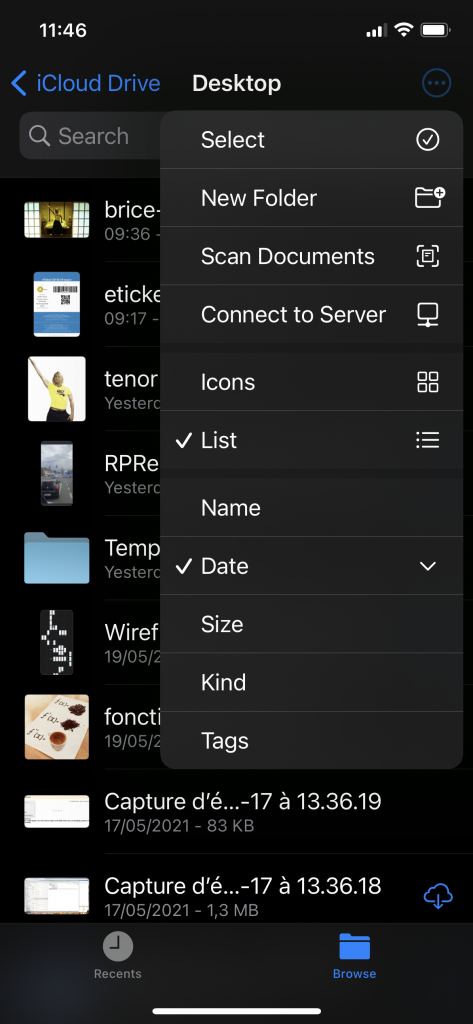
On the iPhone, launch the Files app. On the top right corner, there is this little icon, a circle with three dots in it. Click it and select “Scan Documents”.

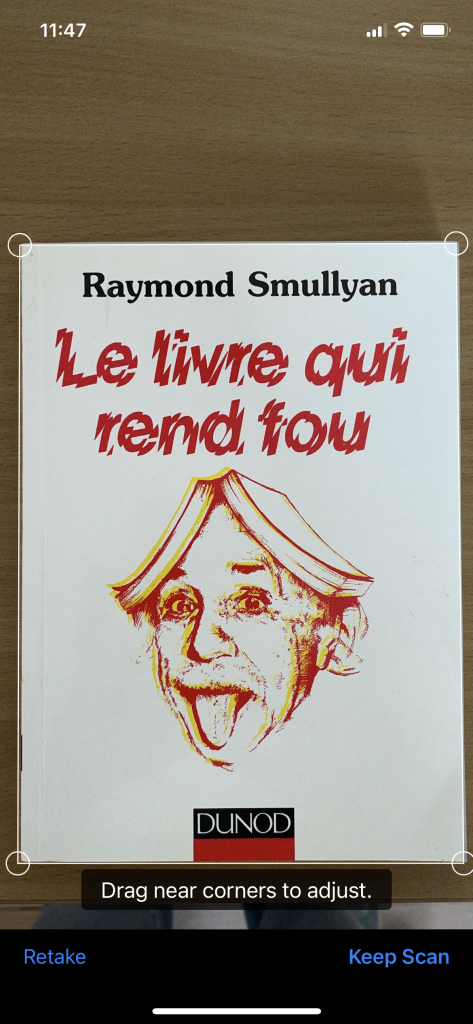
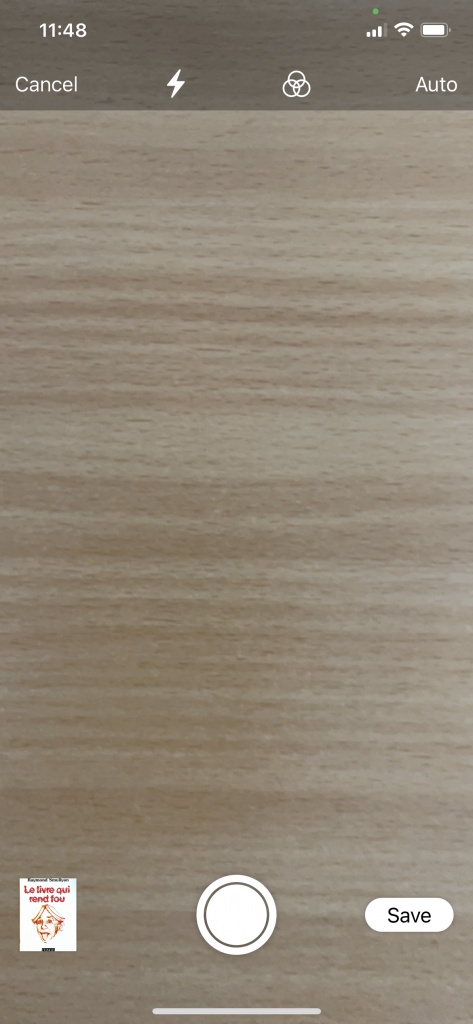
The iPhone switches to camera mode. Point the document and click the white button or let the iPhone detect the document and automatically take the picture. Continue with as many pages a you have in your document, in order to generate a multi-page PDF.

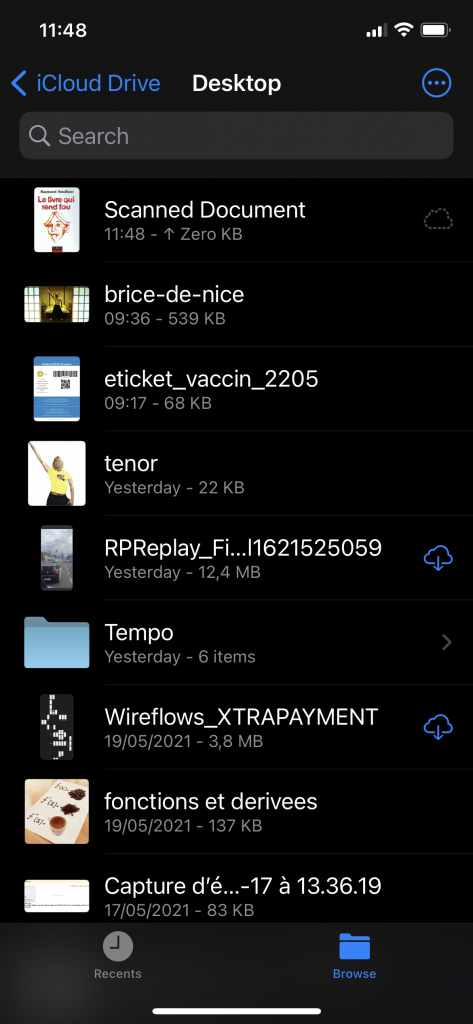
When done, click the Save button and your scanned document will be saved right where you selected in Files. For instance in Desktop or Documents or just any of your iCloud subfolders.

Click and hold your finger on the document, and you’ll get a nice list of useful options such as rename, move, copy or duplicate. Select rename in order to give the document an easy to retrieve name and a nice hint about its content.

If you saved the document in your iCloud folder, it will replicate in no time to the cloud and soon enough on your Mac, iPad or PC, assuming they are connected to the same iCloud account.

All this is natively included in you iPhone. No need to install any app.

Comment scanner un document sur un iPhone

Vous recevez une facture papier que vous voudriez archiver sur votre ordinateur. On vous demande de signer un document et de le renvoyer par mail. Mais vous ne disposez pas de scanner chez vous. Comment faire?

Vous avez un iPhone? Vous voilà sauvé!

Sur votre iPhone, lancez l’application Fichiers (ou Files en anglais). En haut à droite de l’écran une petite icône, un cercle contenant trois points alignés. Cliquez-là et choisissez “Scanner un Document” (Scan Documents dans la version anglaise).

L’iPhone passe en mode photo. Visez le document à scanner et poussez sur le bouton de prise de vue ou laissez l’appareil détecter le document et prendre l’image automatiquement. Vous pouvez continuer à scanner d’autres pages afin de constituer un document PDF de plusieurs pages.

Enfin cliquez sur Sauvegarder (Save) et le document sera enregistré en format PDF à l’emplacement choisi dans vos dossiers.

Par exemple Bureau ou n’importe quel autre dossier de votre iCloud. Pointer le document et garder le doigt dessus vous offrira diverses options utiles telles que dupliquer, renommer, copier ou déplacer le document. Le nom par défaut étant “document scanné” (scanned document) il est utile de le renommer et de lui donner un nom qui permettra de le retrouver facilement et d’avoir une idée de son contenu.

Si votre emplacement de stockage était dans iCloud (Bureau ou Documents et leurs sous-dossiers), votre document ne tardera pas à être chargé dans iCloud et donc accessible également dans son dossier sur votre Mac, iPad ou PC pour autant qu’ils soient configurés avec le même compte iCloud.

Tout cela est natif sur votre iPhone. Pas besoin d’installer un logiciel ou une app quelconque.

How to migrate from old to new iPhone

You just received your new iPhone (thanks Santa Claus) and you would like to recover all your data from your old iPhone, which you still have and which is still working fine. You will be able to resell it or give it to someone you know.

Some initial considerations

Do you have a backup of your old iPhone? Is the capacity of your new iPhone equal to or greater than that of the old one? Do you want to migrate absolutely all content from the old to the new? It is important to answer these questions before any data migration.

Backup

It is important to have a backup of your iPhone, in all circumstances. Not just as part of the purchase of a new model. It may be necessary to restore a backup after a repair or when replacing a lost, stolen or permanently broken iPhone that cannot be repaired. The Apple support pages explain everything you need to know about backup. It’s here. Note, however, that an encrypted backup can also back up security data, such as passwords to third-party applications or sensitive data (health for example). The backup password (encryption key) must be carefully chosen and itself backed up. Indeed, it will be necessary to restore data on the new iPhone. You can also do without the backup to restore data to the new iPhone, using the iPhone-to-iPhone copy method.

Migration

The second question concerns migration. Do you want to migrate the entire old iPhone to the new one? Don’t you have too many unnecessary apps that you want to get rid of while enjoying this new iPhone? Do you want to give your iPhone a completely different (new) look or, on the contrary, do you prefer to find all the applications and settings (wallpaper, etc.) as on the old one?

Capacity

The storage capacity of your new iPhone must be at least equal to or greater than that of the old one, if you want to migrate all your data. If this is not the case, we will probably have to make choices. The wisest thing in this case would be to start on the new iPhone from scratch and install only the apps you want.

Migrate data

There you have it, you have answered the above questions and you are on your way to the complete data migration from the old iPhone to the new one. Apple explains the procedure in its pages here.

After migration

After the migration, you may find that some data has not changed from the old to the new phone to the apple. For me, with the device-to-device migration method, the following data did not pass:

  • Bluetooth connections: you will need to reconnect to each of the Bluetooth devices you use: speakers, car, headsets, etc.
  • Banking applications: most banking applications, for obvious security reasons, will ask you to create a profile again, probably through bank security, such as digipass, token or other.
  • Wifi: In my case, the saved WiFi networks seem to have disappeared, so you will have to reconnect to each of them on the next visit.
  • Google Authenticator: If you are using Google Authenticator for two-factor authentication on secure sites, you will need to reconfigure them. Please note that this can be difficult on some sites if your Google Authenticator app is no longer operational on your old phone. Make sure you have reconfigured all of your Google Authenticator sites on the new phone, before deleting the old one or deleting the app.

Last thing

When this is all done, you should have a new iPhone that looks like (or almost) the old one. Your photos are all there and your apps in their place.

Remember to back up your phone to your computer, or in iCloud if you have enough space.

Normally you should have re-entered your fingerprint or face for TouchId or FaceId. The applications for which you have authorized FaceId or TouchId to authenticate you, you will have to reconfirm this choice. Ditto for location preferences for example.

If possible, keep the old phone for a few more days to make sure nothing is missing.

You are now all set to completely erase your old iPhone. Apple explains the procedure here.