Ajouter un SSD dans votre iMac

Je me suis récemment installé un disque SSD supplémentaire dans mon iMac 27″ mi-2011. J’ai opté pour le Sandisk Ultra II 960GB (acheté en solde sur Amazon.fr à 200EUR).

La procédure d’installation comme détaillée par iFixit, n’est pas pour tout le monde. Vous devez être rompu à l’ouverture d’ordinateurs et au remplacement de pièces.  L’iMac est une machine assez complexe, pas comme la tour de PC moyenne . Il m’a fallu 2 bonnes heures pour démonter, ajouter le SSD (situé sous le lecteur optique), brancher le câble SATA sous la carte-mère et remonter le tout. À la fin du processus,  qui ne m’a pas semblé aussi dur que je le craignais, mon iMac ne voulait pas démarrer! Écran noir et des bruits étranges. Pas de BONG de démarrage , juste le disque dur qui boucle entre arrêt et démarrage. 🙁

J’ai donc rouvert la machine (je deviens un expert ? )  et j’ai trouvé qu’un connecteur ZIF (Zero Insertion Force), le connecteur principal de l’écran LCD, n’a pas été correctement branché. Après l’avoir remis correctement en place et refermé l’iMac, grand soulagement en entendant le BONG de démarrage .

J’ai alors configuré TRIM sur le nouveau SSD à l’aide de l’outil Trimenabler: pour une raison quelconque, les instructions de ligne de commande pour activer le TRIM ne fonctionnent pas pour moi: pas d’erreur, mais le TRIM reste off.

Ensuite j’ai cloné le disque dur principal en utilisant SuperDuper! Il a fallu plusieurs heures pour environ 700GB. J’ai enfin changé le disque de démarrage par défaut dans les préférences systèmes sur le SSD nouvellement installé, et la magie a opéré.

Le temps de démarrage est en secondes (contre la minute), ouvrir Word ou Excel, 1 sec (contre 10 ou plus)! La différence est vraiment spectaculaire.

Si vous êtes en mesure de le faire, je le recommande. Par contre si vous n’êtes pas à l’aise dans les entrailles d’un ordinateur, ne vous lancez pas avec un iMac tout de suite.

Install additional SSD in your iMac

I have recently installed an additional SSD drive in my iMac 27″ mid-2011. I opted for the Sandisk Ultra II 960GB.

The installation procedure as detailed by iFixit, is not for just anyone. You need to be experienced with opening computers and replacing parts. The iMac is rather complex machine, not like the average PC tower. It took me a good 2 hours to dismount, add the SSD (located under the optical drive) and remount the iMac. At the end of the process, which appeared not as hard as I feared, my iMac would not start! Black screen and strange noises. No startup BONG, just the hard drive cycling up and down.

I thus reopened it (I become an expert 😉 and found the ZIF (Zero Insertion Force)  main connector of the LCD panel, was not properly plugged. After fixing this and closing the iMac, I was very relieved to hear the startup BONG.

I then configured TRIM on the new SSD using Trimenabler tool : for some reason, the command line instructions to turn TRIM on did not work for me: no error, but the TRIM remained off.

Then I cloned the main hard disk using SuperDuper! It took several hours for approximately 700GB. I changed the default startup disk in the Systems Preference to the newly installed SSD, and the magic happened.

The boot time is in seconds, opening Word or Excel, 1 sec! The difference is really spectacular.

If you are able to do it, I recommend it. If you never hacked into any computer, don’t start though with the iMac.

Enregistrement vidéo d’écran sur votre Mac

Contrairement à Windows, l’enregistrement vidéo de l’écran du Mac est inclus à QuickTime Player dans Mac OS X 10.6 – 10.9 et suivant. On peut enregistrer le plein écran ou une zone déterminée.

Voici comment enregistrer l’écran du Mac:

  • Lancer QuickTime Player (located in /Applications/) ou dans Utilitaires
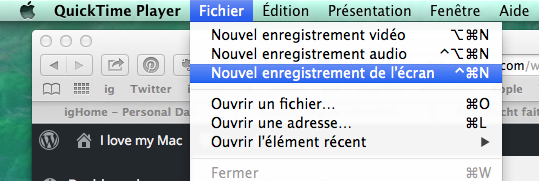
  • Dans le menu Fichier, cliquer sur “Nouvel enregistrement de l’écran”

quicktime

  • Cliquer sur le bouton rouge “Enregistrer”
  • Pour arrêter, cliquer sur le bouton Stop dans la barre de menu ou Command+Control+Escape
  • Dès que le l’enregistrement est arrêté, il s’ouvre automatiquement dans QuickTime Player comme “Screen Recording.mov” que l’on peut sauvegarder où on veut avec un nom de fichier au choix.
  • L’enregistrement vidéo est au format mp4 dans un conteneur mov. Il suffit de le renommer en .mp4 pour l’avoir sous une forme native mp4.

Screen recorder is built in your Mac

Unlike in Windows, the screen recorder function is included with QuickTime Player in Mac OS X 10.6 – 10.9 and later. You can record full screen or just a defined zone on the screen.

Here’s how to use it to capture a video of the Mac screen in action:

  • Launch QuickTime Player (located in /Applications/) or in Utilities
  • Pull down the File menu and select “New Screen Recording”

screen recording mac

  • Press the Red button to start recording the screen activity
  • To stop recording, either press the Stop Recording button in the menubar, or hit Command+Control+Escape
  • Once the recording is stopped, the capture is automatically opened in QuickTime Player as “Screen Recording.mov” which you can then save and use as you’d like
  • The recording is actually in mp4 format encapsulated in a mov container. You can just rename the file as mp4 in order to have it as a native mp4.

Note that the sound recording during the session is either none or the built in microphone. No way to record the system sound 🙁 in order to e.g. save a Youtube video locally. Too bad.

How to restore the old “Get Info” widget in Itunes 12

In Itunes 12 the “Get Info” has been revamped. Gone is the ability to drag and drop album illustration for instance.

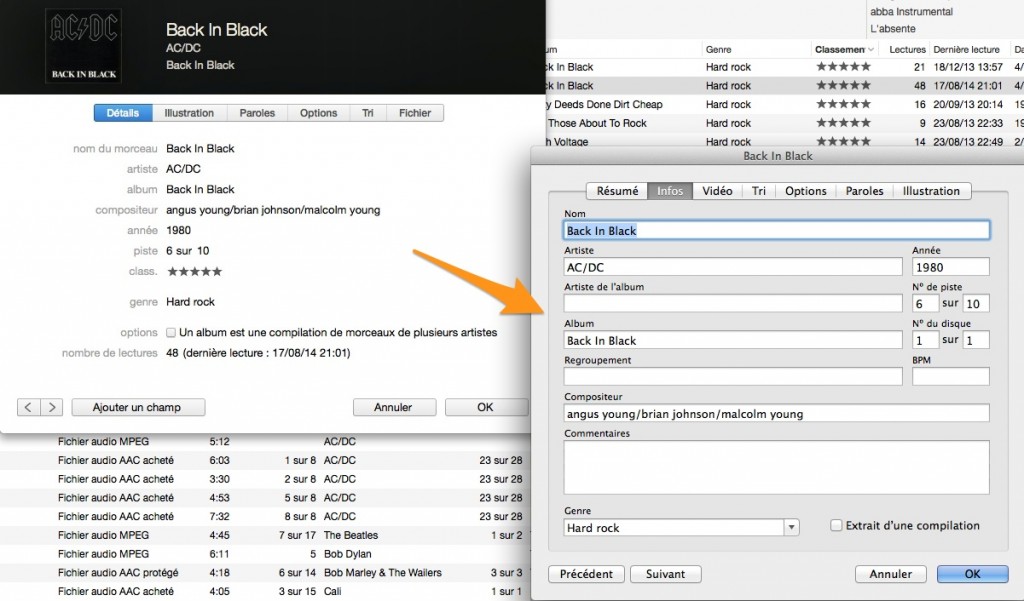
The good news is that the old version of the Get Info widget still exists and get be called by Alt-click on the Get Info in contextual menu, instead of just clicking.

Get info old 2 new